
Introduction
Images have become an essential part of our daily digital lives. Whether you’re applying for a government job, submitting an online application, creating a blog post, uploading products to an e-commerce store, or sharing documents through email, image size often becomes a major challenge. Many websites set a strict upload limit, and one of the most common requirements is compress image to 100KB.
Unfortunately, many people believe that reducing an image to 100KB automatically means sacrificing quality. This is one of the biggest misconceptions. Modern image compression techniques allow you to reduce file size significantly while keeping the image clear, readable, and suitable for online use.
If you’ve ever seen messages like “File size exceeds the maximum limit”, “Image must be less than 100KB”, or “Upload failed due to file size restrictions,” you’re not alone. Thousands of users search every day for a reliable way to compress images without downloading complicated software.
This guide explains everything you need to know about compressing images to 100KB, including how image compression works, why websites require smaller image sizes, how to maintain quality, and which image format is best for different situations.
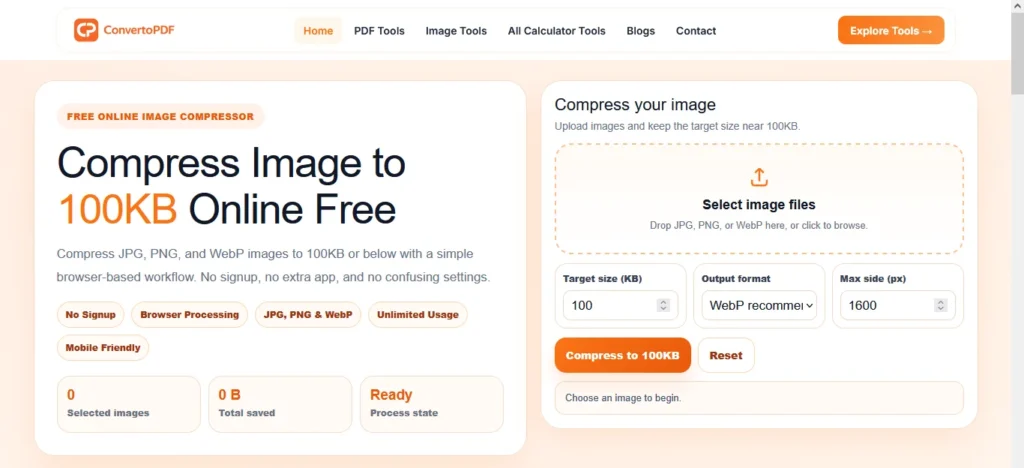
What Does “Compress Image to 100KB” Mean?
Compressing an image to 100KB means reducing its file size so that it becomes approximately 100 kilobytes or smaller while keeping the image visually acceptable.
Image compression doesn’t simply shrink the picture. Instead, it optimizes the image by removing unnecessary data, adjusting compression quality, and, when required, resizing the image dimensions. The goal is to achieve a smaller file without making the image look blurry or pixelated.
For example:
| Original Size | Compressed Size |
|---|---|
| 4.2 MB | 100 KB |
| 2.8 MB | 100 KB |
| 950 KB | 100 KB |
| 350 KB | 100 KB |
The amount of quality preserved depends on several factors, including:
- Original image resolution
- Image format (JPG, PNG, WebP)
- Number of colors
- Transparency
- Compression algorithm
Modern browser-based compression tools use smart optimization techniques to reduce file size efficiently while preserving as much detail as possible.
Why Do So Many Websites Require Images Under 100KB?
Many websites limit uploaded image sizes to improve performance, reduce server storage, and speed up file transfers. Smaller images upload faster, download faster, and provide a better user experience, especially on mobile devices.
Some common situations where a 100KB image limit is required include:
Government Recruitment Forms
Many government recruitment portals require applicant photographs and signatures to remain under a specific file size.
Examples include:
- SSC
- UPSC
- Railway Recruitment
- Police Recruitment
- Defence Applications
- Banking Exams
College and University Admissions
Educational institutions frequently ask students to upload passport-size photographs and scanned documents with strict size limitations.
Large images may prevent the application form from being submitted successfully.
Passport and Visa Applications
Passport and visa portals often specify exact image dimensions and file size requirements.
Compressing an image correctly helps avoid repeated upload failures.
Job Portals
Professional networking platforms and company career portals commonly restrict profile photo sizes to improve loading speed.
Keeping your image under 100KB ensures smooth uploads.
Websites and Blogs
Large images slow down websites.
Website owners and bloggers compress images before uploading because:
- Faster loading pages improve user experience.
- Smaller images consume less bandwidth.
- Better performance can contribute to improved SEO.
- Faster websites often have better Core Web Vitals.
For WordPress websites, image optimization is considered one of the simplest ways to improve page speed.
E-commerce Stores
Online stores often contain hundreds or thousands of product images.
Compressing images helps:
- Product pages load faster.
- Mobile shopping experience improves.
- Bounce rate decreases.
- Hosting storage is reduced.
Benefits of Compressing Images to 100KB
Reducing an image to approximately 100KB offers several practical advantages beyond simply meeting upload requirements.
Faster Upload Speed
Smaller images upload almost instantly, even on slower internet connections.
This is particularly useful when submitting online forms or sharing files through email.
Better Website Performance
Optimized images improve page loading speed.
Faster pages provide a smoother browsing experience and may help search engines understand that your website offers a better experience for visitors.
Reduced Storage Usage
Compressing hundreds of images can save a significant amount of storage space.
For photographers, bloggers, students, and businesses, this becomes increasingly valuable over time.
Easier Sharing
A 100KB image is much easier to send through:
- Telegram
- Slack
- Discord
- Microsoft Teams
Smaller files also upload more quickly to cloud storage platforms.
Better Mobile Experience
Mobile users often browse using limited data connections.
Lightweight images load faster, consume less mobile data, and reduce waiting time.
Different Ways to Compress an Image
There isn’t just one method of reducing image size. Professional image optimization usually combines several techniques.
1. Quality Compression
This method reduces unnecessary visual information while keeping the image looking almost identical to the original.
For photographs, this is usually the most effective approach.
2. Resize Image Dimensions
If an image measures 5000 × 3500 pixels, it contains far more information than most websites actually need.
Reducing the dimensions to 1600 × 1200 or 1200 × 900 often decreases the file size dramatically without affecting normal viewing.
3. Change the Image Format
Different formats behave differently.
- JPG – Best for photographs and general compatibility.
- PNG – Ideal for graphics with transparency but usually creates larger files.
- WebP – Excellent compression with good visual quality and smaller file sizes.
In many cases, converting a JPG or PNG to WebP can reduce the file size even further while maintaining similar appearance.
Which Image Format Is Best for 100KB?
Choosing the right image format can make a big difference when trying to reach a target size like 100KB.
| Format | Best For | Compression |
|---|---|---|
| JPG | Photos | Excellent |
| PNG | Logos & Transparent Images | Moderate |
| WebP | Websites & Modern Browsers | Excellent |
| GIF | Simple Animations | Limited |
How to Compress an Image to 100KB (Step-by-Step Guide)
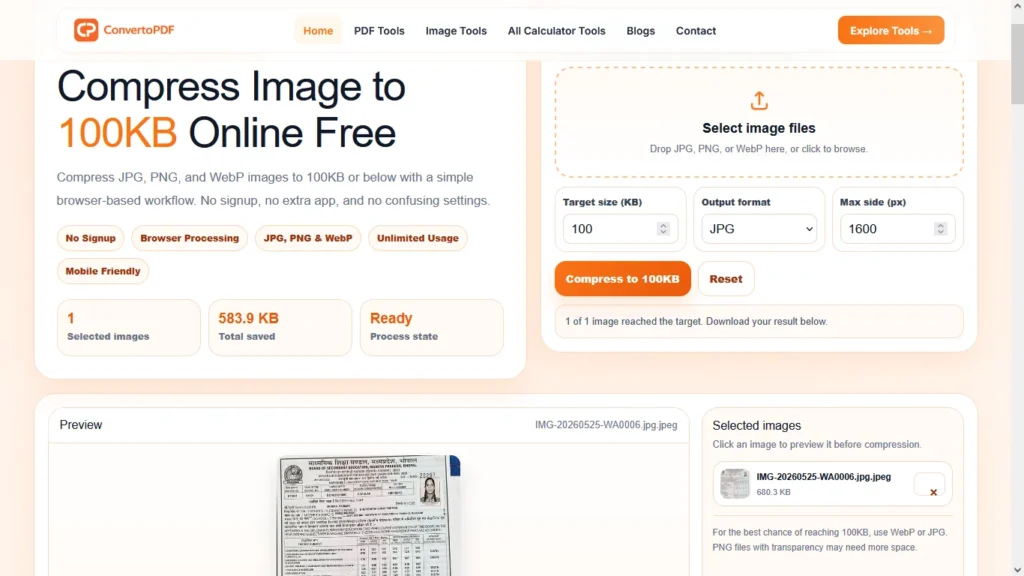
If you’ve never compressed an image before, don’t worry. The process is much easier than most people think. With a browser-based image compression tool, you can reduce your image size to around 100KB in just a few clicks.
Step 1: Upload Your Image
Open the Compress Image to 100KB tool and upload your image.
Most tools support popular formats such as:
- JPG
- JPEG
- PNG
- WebP
You can either click the upload button or simply drag and drop your image into the upload area.
📸 Image Suggestion: Upload Interface Screenshot
Alt Text: Compress Image to 100KB upload tool
Step 2: Set the Target Size
Leave the target size set to 100KB.
Some websites may require different limits like:
- 20KB
- 50KB
- 100KB
- 200KB
If needed, simply change the target value according to the website’s requirements.
Step 3: Choose the Best Output Format
Choosing the correct image format can make a huge difference.
JPG
Best for:
- Passport photos
- Profile pictures
- Government forms
- Student applications
PNG
Best for:
- Logos
- Transparent images
- Graphics
WebP
Best for:
- Websites
- Blogs
- SEO
- Faster loading pages
If the website accepts WebP, it usually provides the smallest file size while maintaining excellent image quality.
Step 4: Compress the Image
Click the Compress button.
The tool automatically:
- Optimizes quality
- Removes unnecessary image data
- Resizes dimensions when needed
- Attempts to reach the selected file size
The process normally takes only a few seconds.
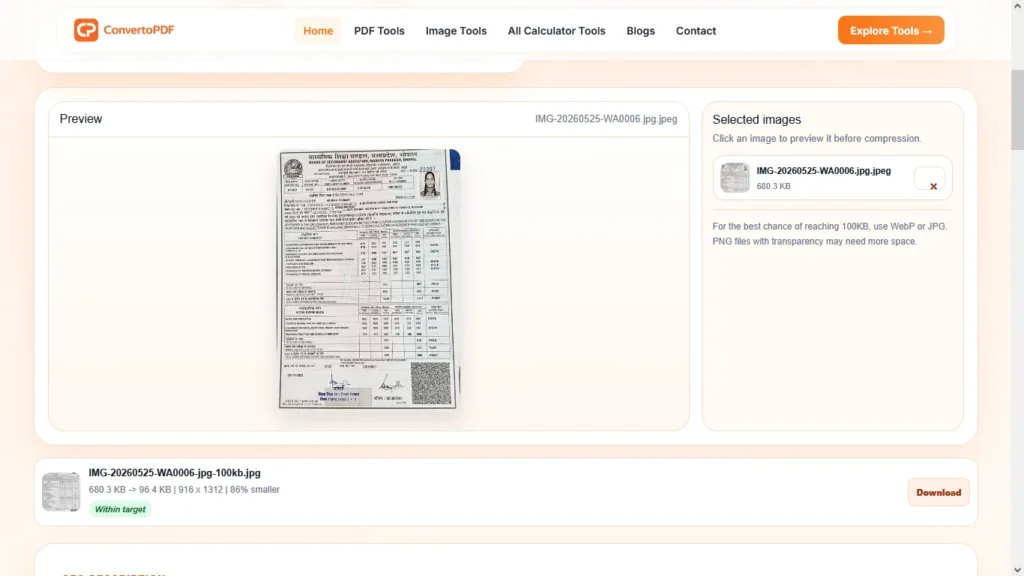
Step 5: Preview the Result
Before downloading, always preview the compressed image.
Check:
- Is the text readable?
- Is the face clear?
- Are colors natural?
- Is the image blurry?
If everything looks good, proceed to download the optimized image.
Step 6: Download the Image
Download the compressed image and upload it wherever required.
Examples:
- SSC Form
- UPSC Form
- Railway Application
- Passport Portal
- University Admission
- Job Portal
How Our Compress Image to 100KB Tool Works
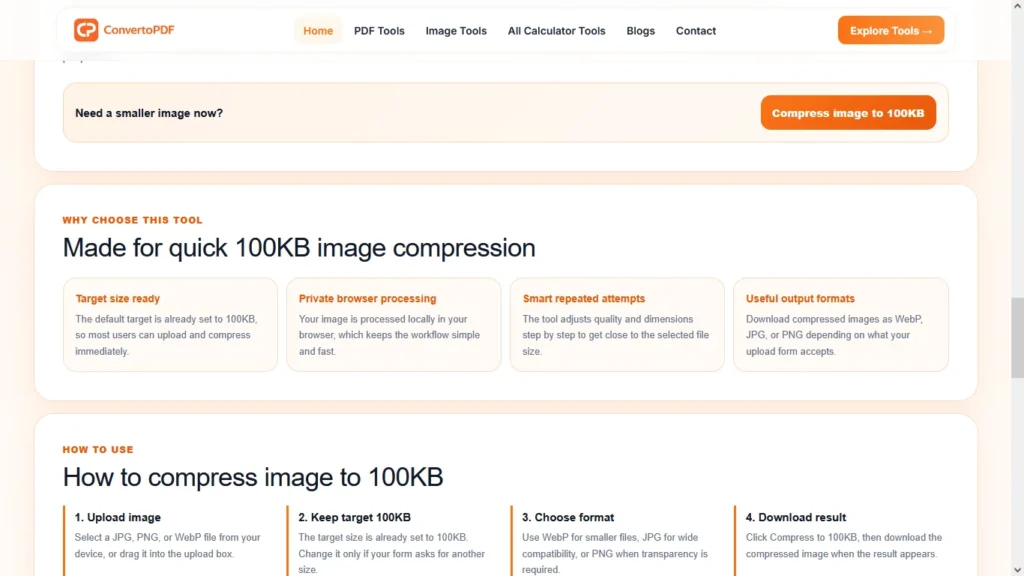
Unlike many traditional desktop applications, our browser-based tool is designed to simplify image compression without requiring installation or registration.
When you upload an image, the tool intelligently analyzes several factors, including:
- Original file size
- Image dimensions
- Image format
- Compression quality
- Target file size
Instead of applying one fixed compression level, it gradually adjusts quality and image dimensions until it reaches a size close to your selected target.
This approach helps preserve visual quality while reducing unnecessary file size.
Another important advantage is browser-based processing. Since the compression happens directly in your browser, you don’t need to install software before using the tool.
How to Keep Image Quality While Compressing
One of the biggest concerns users have is losing image quality.
Fortunately, there are several ways to reduce file size while keeping the image looking professional.
Start With a High-Quality Image
A clear original image always produces better compression results than an already compressed image.
Avoid repeatedly compressing the same file.
Choose the Correct Format
For photographs:
Use JPG or WebP.
For transparent graphics:
Use PNG.
For websites:
WebP usually offers the best balance between quality and file size.
Avoid Extremely Large Dimensions
A 5000×4000 pixel image is unnecessary for most online forms.
Reducing the dimensions before compression often produces much better results.
Typical recommended dimensions:
- 600×600
- 800×800
- 1200×1200
- 1600×1600
Don’t Compress Multiple Times
Every compression removes a small amount of image information.
Compressing the same image again and again can gradually reduce visual quality.
Instead:
Always compress the original image.
Common Mistakes People Make
Many users struggle to reach exactly 100KB because of avoidable mistakes.
Using PNG for Everything
PNG files are usually much larger than JPG.
Unless transparency is required, JPG or WebP often provides better compression.
Uploading Camera Originals
Modern smartphones capture images between 3MB and 15MB.
Compressing such large files directly to 100KB can significantly reduce quality.
Resizing the image first usually gives much better results.
Ignoring Image Dimensions
Some users only reduce quality without reducing dimensions.
Both factors affect the final file size.
Choosing the Wrong Format
Sometimes simply converting:
PNG → WebP
or
PNG → JPG
reduces the file size dramatically without noticeable quality loss.
Compress Image to 100KB for Government Forms
Many official websites require photographs under a fixed size.
Examples include:
- SSC CGL
- SSC CHSL
- UPSC
- Railway Recruitment Board (RRB)
- Police Recruitment
- Defence Exams
- Banking Exams
- State PSC Exams
- Scholarship Applications
- College Admissions
Always read the official image guidelines before uploading.
Different websites may require:
- File size
- Image dimensions
- Aspect ratio
- Background color
- Image format
Meeting all these requirements helps avoid upload errors.
Advanced Tips to Compress Images Without Losing Quality
Image compression is not only about reducing the file size. The real goal is to create an image that looks professional while remaining small enough for fast uploads and quick loading.
Here are some advanced techniques professionals use to achieve better results.
Start With the Original Image
Whenever possible, always compress the original image instead of compressing an already compressed version.
Repeated compression removes more image information every time. This can result in blurry text, poor color quality, and visible compression artifacts.
If you have the original photo from your camera or phone, use that file as the starting point.
Crop Before Compressing
Many images contain unnecessary background that doesn’t add any value.
For example:
- Empty sky
- Extra walls
- Blank space
- Unused background
Cropping these areas before compression reduces file size naturally while keeping the important subject clear.
Resize Large Images
A 4000×3000 pixel image is usually unnecessary for websites, blogs, or online forms.
If your image is only going to be displayed at around 1000 pixels wide, reducing the dimensions before compression can save a significant amount of file size without affecting visual quality.
Choose the Correct Format
Different situations require different image formats.
JPG
- Best for photographs
- Smaller file size
- Wide compatibility
PNG
- Best for transparent graphics
- Logos
- Icons
WebP
- Excellent quality
- Smaller files
- Faster websites
- Recommended for modern websites
Choosing the correct format often reduces the file size more effectively than increasing compression alone.
Why Image Compression Matters for SEO
Many website owners only think about image size when an upload fails.
In reality, optimized images play an important role in website performance and search engine optimization.
Smaller images help pages load faster, especially on mobile devices. Faster loading pages generally provide a better user experience, reduce waiting time, and encourage visitors to stay on the website longer.
Image optimization can also help improve important performance metrics such as Core Web Vitals, which focus on loading speed and user experience.
If you publish blogs regularly, compressing images before uploading them can make your website feel much faster without changing your content.
Real-Life Use Cases
Compressing images to around 100KB is useful in many everyday situations.
Students
Students often need to upload passport-size photographs for:
- College admissions
- Scholarship applications
- Entrance examinations
- Online registrations
Government Job Aspirants
Many recruitment websites require photographs and signatures under a specific size.
Examples include:
- SSC
- UPSC
- Railway Recruitment
- Police Recruitment
- Banking Exams
- State Government Jobs
Bloggers
Bloggers compress images before publishing articles because smaller images help pages load faster and provide a better reading experience.
Website Owners
Optimized images improve page performance and reduce hosting bandwidth usage.
This becomes especially important when a website contains hundreds of images.
Online Sellers
E-commerce stores often display thousands of product images.
Smaller images help customers browse products more quickly while reducing server load.
Frequently Asked Questions
Is it possible to compress an image to exactly 100KB?
It depends on the original image. Most modern compression tools can get very close to 100KB, but some images may require resizing or a different output format to reach the exact target.
Will compressing an image reduce quality?
Some quality reduction is normal, but a good compression tool balances file size and visual clarity to keep the image usable.
Which format gives the smallest file size?
In most cases, WebP produces the smallest file while maintaining excellent quality. JPG is also a good choice for photographs.
Can I compress PNG images to 100KB?
Yes. However, PNG images with transparency or complex graphics may require additional resizing or conversion to another format to reach the target size.
Is browser-based image compression safe?
Browser-based tools process the image directly on your device, making them a convenient option for users who prefer not to upload files to a remote server.
Can I compress multiple images at once?
Yes. Batch compression allows you to reduce the size of several images in one workflow, saving time when working with large collections.
Will the compressed image work for government forms?
If the image meets the required file size, dimensions, and format specified by the official website, it should be suitable for upload. Always check the portal’s guidelines before submitting.
Why is my image still larger than 100KB?
The original image may have very large dimensions or contain complex details. Reducing the image dimensions or switching to WebP often helps.
Can I compress images on a mobile phone?
Yes. Modern browser-based tools work on Android and iPhone without installing additional software.
Should I compress images before uploading them to WordPress?
Yes. Compressing images before uploading helps improve page loading speed and reduces storage usage.
Final Thoughts
Compressing an image to 100KB doesn’t have to be difficult. With the right combination of image format, dimensions, and compression settings, you can significantly reduce file size while maintaining good visual quality.
Whether you’re submitting an application form, uploading a profile picture, publishing a blog post, or optimizing an e-commerce website, properly compressed images save storage, upload faster, and create a smoother experience for users.
If you regularly work with images, choosing a browser-based image compression tool can simplify your workflow and help you meet different upload requirements without installing heavy software.
Related Tools
If you frequently optimize images, you may also find these tools useful:
- Compress Image to 20KB
- Compress Image to 50KB
- Compress PDF to 200KB
- Image Resizer
- Image Converter
- Bulk WebP Generator
- Image to Base64
- JPG to WebP
- PNG to JPG
Need More PDF & Image Tools?
Explore free online tools to compress PDFs, resize images, convert files, and optimize documents instantly.
Explore Tools →